This article shows you how to browse, edit, download, and upload your Palworld server's files using the panel's built-in file manager, and how to connect over SFTP for bulk transfers. You will also learn where Palworld keeps its save data and configuration files.
Open the file manager
- Log in to the EZ Game Host panel and open your Palworld server.
- Click Files in the sidebar.
You will see a table of your server's files and folders with Name, Size, and Modified at columns.
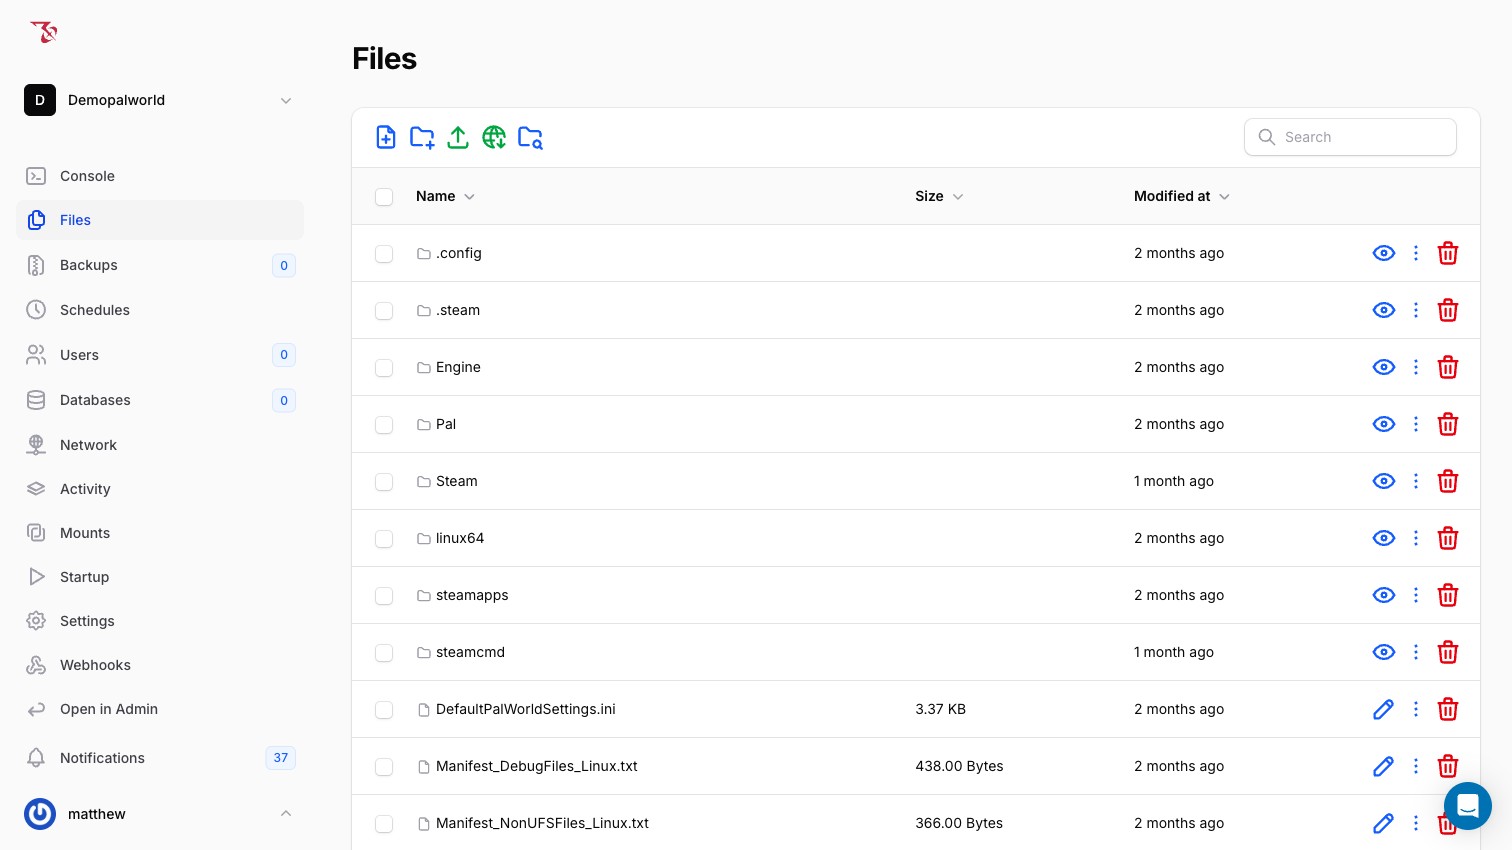
Toolbar
The icons at the top-left of the file list let you (left to right):
- Create a new file
- Create a new folder
- Upload files from your computer
- Pull a file from a URL (globe icon)
- Search inside files
There is also a Search box on the right to filter the current directory by name.
Navigating and row actions
- Click a folder to open it. Breadcrumbs at the top (for example, Files ≫ Pal ≫ Saved) show where you are. Click any crumb to jump back up.
- Hover over a row to reveal its actions:
- Files: a pencil icon (edit), a ⋮ (more) menu, and a red trash icon (delete). The ⋮ menu includes a Download entry.
- Folders: an eye icon (open), a ⋮ menu, and a red trash icon.
- Use the checkboxes to select multiple items at once.
- Use the Per page selector (25/50/100/150/200) if a directory has many files.
Edit a file in the built-in editor
- In Files, browse to the file (for example,
Pal/Saved/Config/LinuxServer/PalWorldSettings.ini). - Click the pencil icon on the file's row. The editor opens with line numbers and a header showing the path, e.g. "Editing: Pal/Saved/Config/LinuxServer/PalWorldSettings.ini".
- The Syntax Highlighting dropdown is set automatically based on the file type (
.inifiles highlight as "ini"); change it if needed. - Make your changes, then click:
- Save & Close to save and return to the file list,
- Save to save and keep editing, or
- Cancel to discard your changes.
PalWorldSettings.ini keys (like ServerName, AdminPassword, and ServerPlayerMaxNum) are rewritten from the Startup variables on every start, so see Changing Palworld game settings before editing that file.Download a file
- Hover over the file's row and open the ⋮ (more) menu.
- Click Download.
Upload files
- In Files, browse to the folder you want to upload into (use the breadcrumbs to check you are in the right place).
- Click the upload icon in the toolbar to upload files from your computer.
Next to it, the toolbar also has a globe icon for pulling a file directly from a URL (handy when the file is already hosted online) and an icon for searching inside your files.
Pal/Saved folder), use SFTP instead. See Use SFTP for bulk transfers below.Key Palworld paths
The root of your server contains the Palworld dedicated server installation:
| Path | What it is |
|---|---|
PalServer.sh, Engine/, Steam/, steamapps/, linux64/, steamcmd/ | Server binaries and Steam runtime. Leave these alone. |
DefaultPalWorldSettings.ini | A reference copy of every game option and its default value. Do not edit it; the live config is elsewhere. |
Pal/ | The game itself: Binaries, Content, Intermediate, and Saved. |
Pal/Saved/ | Your world save data lives under here. This is the folder to protect with backups. |
Pal/Saved/Config/LinuxServer/ | Live configuration files, including PalWorldSettings.ini. The folder also contains many small Unreal Engine .ini stubs you can ignore. |
Pal/Saved. Never delete it, and back it up before major changes.Use SFTP for bulk transfers
The web file manager is best for quick edits. For moving many files or large files (for example, copying your whole Pal/Saved folder to your computer), use SFTP with a client such as FileZilla or WinSCP.
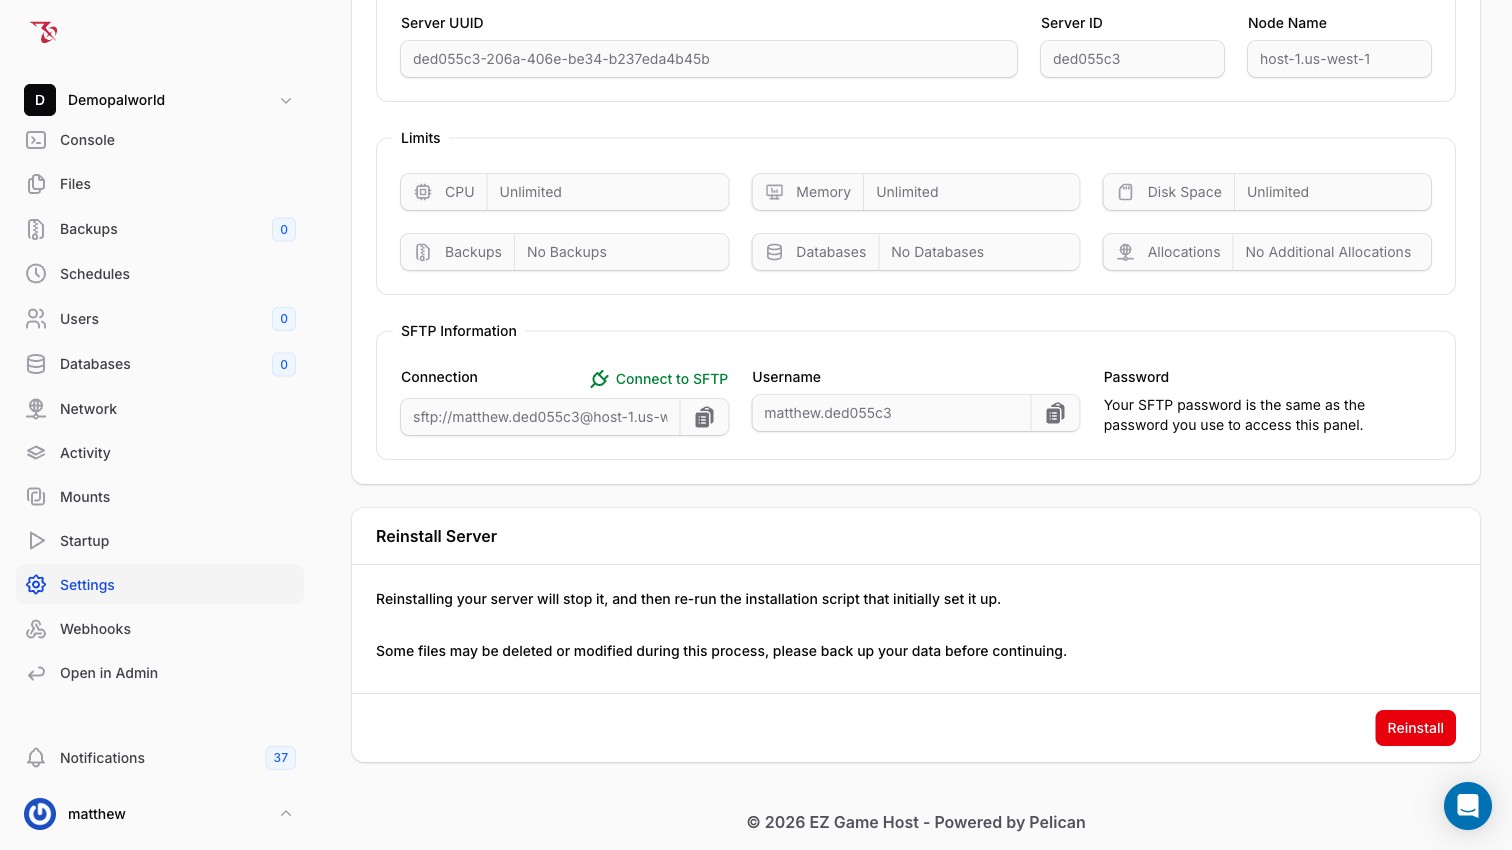
Find your SFTP details
- Click Settings in the sidebar.
- In the SFTP Information card you will find:
- A connection string like
sftp://<panel-user>.<server-id>@<host>with a copy button. - Your Username in the form
panelusername.serverid(your panel username followed by the server's short ID), with a copy button. - Your password: as the panel states, "Your SFTP password is the same as the password you use to access this panel."
- A green Connect to SFTP button.
- A connection string like
Connect with FileZilla or WinSCP
- Open your SFTP client and create a new connection.
- Use the host from the connection string (and the port, if one is shown), your SFTP Username, and your panel password. Make sure the protocol is set to SFTP, not FTP.
- Connect. Once connected, you should see the same files as in the panel's Files page.
- Drag and drop files between your computer and the server.